Introduction to Mitten Making
Creating your own mittens is a delightful and practical craft. With a mitten template, you can easily cut out the perfect shape for snug, warm mittens. This beginner-friendly project requires minimal sewing skills and offers endless opportunities for customization. Not only do DIY mittens save money, but they also allow you to choose materials that suit your style and climate needs. Whether you’re making a pair for yourself or as a thoughtful gift, homemade mittens add a personal touch to any winter wardrobe.
In this guide, we’ll walk through the basic process of mitten making. We’ll start by discussing the materials you’ll need. Then we’ll provide a step-by-step approach to create your own mitten template. You’ll learn how to customize the template for any size and enhance it with creative design ideas. Lastly, we’ll share tips for cutting, sewing, and adding decorative touches. With our helpful advice, you’ll have a pair of charming, handcrafted mittens ready to wear before the first snowflake falls.

Essential Materials for DIY Mittens
Before diving into the creative process, gathering the right materials is crucial for making DIY mittens. Here’s what you’ll need to start on your mitten-making journey:
- Fleece Fabric: Fleece is ideal for mittens due to its warmth and softness. Choose high-quality fleece to ensure your mittens are cozy and durable.
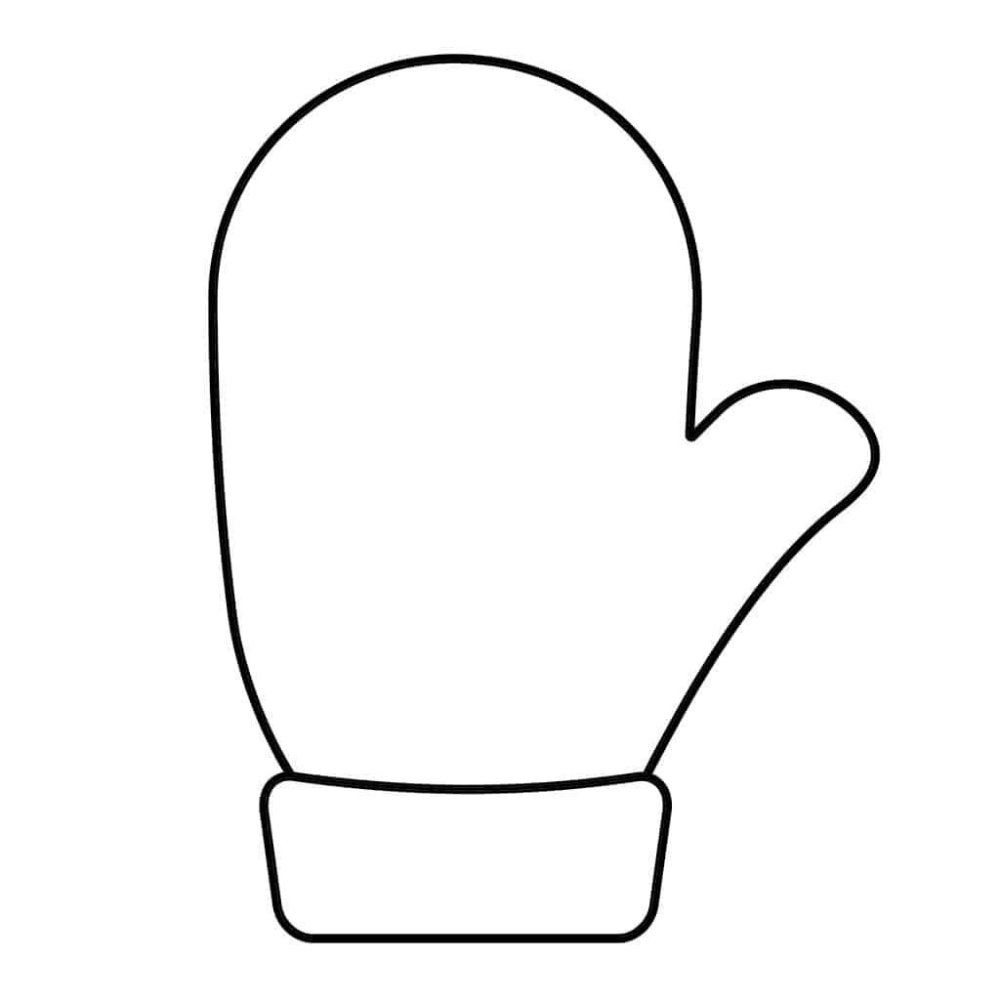
- Mitten Template: A well-designed mitten template is your roadmap for cutting out the correct mitten shape. You can make your own or find one online.
- Sewing Machine or Needle and Thread: Depending on your preference, you can either machine-sew or hand-sew your mittens. Ensure you have strong thread that matches your fabric.
- Fabric Scissors: Sharp scissors are essential for cutting your fabric precisely according to the mitten template.
- Pins: Pins will help you keep the fabric in place while cutting and sewing.
- Measuring Tape: To measure your hand for the mitten template and ensure a snug fit, a measuring tape will come in handy.
- Chalk or Fabric Marker: Use these for outlining the mitten template on your fabric before cutting.
- Embellishments (optional): Consider buttons, embroidery thread, or patches if you plan to add decorative touches.
With these materials at hand, you’ll be all set to craft a pair of mittens that are not only functional but also a stylish expression of your personal taste. In the next section, we’ll guide you through creating your mitten template step by step.
Step-by-Step Guide to Creating Your Mitten Template
Creating a mitten template is the first step to crafting your custom mittens. This simple guide will lead you through each stage of the design process. Start with a blank piece of paper large enough to draw an outline of your hand.
- Trace Your Hand: Place your hand on the paper with fingers closed and thumb extended. Trace around your hand, leaving some space for seam allowance and movement.
- Mark the Wrist: Determine where you want the mitten’s cuff to end. Draw a line across the wrist area for reference.
- Outline the Thumb: Carefully sketch the thumb area. Ensure it offers ample space for comfort and flexibility.
- Draw the Mitten Shape: Use your hand outline as a guide to draw the mitten’s body. Round the fingertips for a better fit.
- Add Seam Allowance: Around the drawn mitten outline, mark a seam allowance of about 1/4 to 1/2 inch. This is essential for sewing.
- Cut Out the Template: Using fabric scissors, carefully cut out the mitten shape from the paper. This is now your mitten template.
Your mitten template serves as the basis for all your future mitten-making projects. Remember to test the fit by making a sample mitten from spare fabric before using your chosen fleece. Making slight adjustments to your template helps ensure the perfect fit. Once satisfied, use the template to cut out your mitten pieces from your selected fabric, ready for the next steps of cutting and sewing.

Customizing Your Mitten Template for Different Sizes
Creating a mitten template that fits perfectly is key for comfortable and functional mittens. But not all hands are the same size. You may need to make mittens for children, adults, or for a special fit. Customizing your mitten template for different sizes is easy with these steps:
- Measure the Hand: Start by measuring the hand of the person you’re making the mittens for. Measure the width across the knuckles and the length from the tip of the middle finger to the wrist.
- Scale the Template: With the measurements at hand, increase or decrease the size of your template accordingly. A common rule is to add about a 1/2 inch for adults and 1/4 inch for children to the original size for a comfortable fit.
- Adjust the Thumb Size: Remember to adjust the thumb section of the template as well. It should be proportional to the rest of the mitten.
- Test the Fit: Before cutting your fabric, make a test mitten using scrap material. Check if it fits the intended hand well and make any necessary adjustments.
By following these steps, you can ensure that your mittens will fit anyone perfectly. It’s a simple process that allows for all kinds of sizes, making your handmade mittens a perfect gift for family and friends of all ages.
Creative Design Ideas for Your DIY Mittens
After creating the basic mitten template, it’s time to infuse your personality into your mittens. Here are some creative design ideas to make your handcrafted mittens stand out:
- Choose Vibrant Colors: Pick fleece fabrics in bright, bold colors or fun patterns that reflect your style or the recipient’s tastes.
- Mix and Match Fabrics: Use different fabrics for the palm and back of the mitten. This not only adds visual interest but also allows you to experiment with textures.
- Incorporate Appliqué: Cut out shapes from fabric leftovers and sew them onto the mittens for a playful touch. Think snowflakes, hearts, or animal shapes.
- Embroider Names or Initials: Personalize your mittens by embroidering names, initials, or special dates onto the cuffs.
- Create Convertible Mittens: Add a flip-top to turn your regular mittens into convertible fingerless gloves with a mitten cap.
- Play with Cuff Designs: Knit or crochet distinctive cuffs or choose a contrasting fabric for an appealing layered look.
- Add Faux Fur: For extra warmth and a luxurious feel, line the cuffs with faux fur or add a fur trim around the wrist.
- Include Touch Screen Patches: Sew conductive thread or special patches on the fingertips, allowing you to use smartphones without removing the mittens.
These ideas serve as a starting point to get your creative juices flowing. Feel free to mix, match, and modify these suggestions to create DIY mittens that are as unique as you are. Moreover, a mitten template can be the foundation for endless creative expressions. With each pair, you’ll not only practice your crafting skills but also produce cozy, customized mittens that showcase your creativity and skill.

Tips for Cutting and Sewing Your Mittens
Now that you have a custom mitten template, it’s time to transform fabric into cozy mittens. Here are some tips to help you cut and sew with ease:
- Lay Fabric Flat: Ensure your fleece fabric lies flat on your workspace. This prevents uneven cutting.
- Secure the Template: Pin your mitten template to the fabric or use weights. This keeps it from moving.
- Trace with Care: Use chalk or fabric marker to trace around the template. Aim for clear, visible lines.
- Cut Precisely: Follow the traced lines closely with sharp fabric scissors. Accuracy here is key for a snug fit.
- Sew Steadily: When using a sewing machine, keep a steady pace. This helps you sew a straight, even seam.
- Backstitch Ends: Start and end each seam with a backstitch. It secures the stitching so your mittens won’t unravel.
- Check the Thumb: Pay extra attention while sewing the thumb. It should allow free movement.
- Allow for Errors: If you stray from the line, don’t fret. Just gently remove stitches and resew.
By following these simple steps, your cutting and sewing will lead to beautiful, well-made mittens. They’ll not only look great but will keep hands warm all winter long.
Adding Decorative Touches to Your Handmade Mittens
Once you’ve crafted your mittens, adding decorative touches can truly make them unique. Here’s how you can personalize your DIY mittens:
- Embroider for Elegance: Hand embroidery can give a touch of elegance. Choose simple patterns like snowflakes or initials.
- Attach Buttons and Beads: Sew on buttons or beads for a playful effect. Pick these to match or contrast with your mitten fabric.
- Add Ribbons or Lace: A ribbon or lace around the cuff can create a charming vintage look. Choose delicate materials for subtlety.
- Use Patches: Iron-on or sew-on patches are great for adding character. Consider patches that reflect hobbies or favorite symbols.
- Knit or Crochet Trims: If you knit or crochet, add a warm trim at the wrist. This also adds another layer of style.
- Contrast Stitching: Use a different color thread for visible stitching. This offers an interesting, contrasted detail.
- Faux Fur Edges: For a luxurious feel, affix faux fur along the cuffs. This adds both warmth and style.
- Create Thumb Accents: Decorate the thumb with a different fabric or color. This small detail can stand out beautifully.
By choosing one or a combination of these adornments, your handmade mittens will be as stylish as they are warm. Remember to consider the personal style of the wearer, and have fun with the process. It’s these small, detailed touches that give DIY projects their handmade charm.
Preserving and Caring for Your DIY Mittens
After crafting your unique mittens, proper care will keep them looking great for years to come. Here are some helpful tips for preserving and caring for your DIY mittens:
- Wash Gently: Hand wash your mittens in cold water with a mild detergent. Avoid strong chemicals that can harm the fabric.
- Dry Correctly: Don’t wring out mittens, as this can misshape them. Instead, gently squeeze out excess water and lay them flat to dry away from direct heat or sunlight.
- Store Safely: When not in use, store your mittens in a cool, dry place. Consider wrapping them in tissue paper to maintain their shape and keep them clean.
- Repair Quickly: Fix any tears or loose threads right away to prevent them from getting worse. Quick mending can save your mittens from bigger repairs later.
- Avoid Heat: Keep mittens away from heaters, fireplaces, and other heat sources that could cause shrinkage or damage.
- Refresh Pilling: If your mittens start to pill, use a fabric shaver or a razor gently to remove the pills and restore a smooth texture.
- Rotate Pairs: If you have multiple pairs, rotate them to avoid excessive wear on any one pair.
By practicing these care routines, your handcrafted mittens will remain soft, warm, and inviting, season after season. Remember that loving your mittens means taking the time to care for them well.