Introduction to Fingerless Gloves Crochet
Fingerless gloves are a trendy accessory. They keep hands warm while fingers remain free. Crafters love them for their style and versatility. The fingerless gloves crochet pattern is popular among beginners and seasoned crocheters. These gloves are perfect for cool weather. Users can text, type, and grip easily while wearing them.
Crochet is a creative and soothing hobby. It involves creating fabric from yarn, using a crochet hook. The fingerless gloves crochet pattern requires basic skills. It can be a fun project for those new to the craft. For veterans, it is an opportunity to experiment and personalize their work.
This guide will take you through the steps to create your pair of fingerless gloves. You will learn about materials, techniques, and patterns. We will also explore ways to customize and care for your gloves. Whether for fashion or function, fingerless gloves are a worthy crochet project.
Essential Materials and Tools
To start your fingerless gloves crochet project, you’ll need some essential materials and tools. Having the right supplies at hand will make the process smoother and more enjoyable.
Choosing the Right Yarn
The yarn you choose is critical to your fingerless gloves’ look and feel. Opt for a yarn that is cozy and has good elasticity. Wool or acrylic blends work well for gloves. They are durable and comfortable. For a softer touch, consider a yarn with a bit of cashmere or alpaca. Make sure to pick a color that matches your style. Solid colors give a classic look while variegated yarns add a fun twist.
Selecting Crochet Hooks
Crochet hooks come in various sizes. Their size affects the tightness of your stitches. For fingerless gloves, a hook that is neither too big nor too small is ideal. Generally, hooks sized between 4 mm to 5 mm are suitable for this fingerless gloves crochet pattern. Ensure that the hook feels comfortable in your hand. This will help you crochet for longer periods without discomfort. An ergonomic crochet hook can be a good investment for your crafting health.
Basic Crochet Techniques for Beginners
To start crocheting fingerless gloves, you must grasp some basic techniques. Even if you’re a beginner, these steps are not hard to learn.
First, you need to learn how to make a slip knot. This is the starting point for most crochet projects. Hold the yarn and form a loop, then pull another loop through it.
Next, mastering chains (ch) is crucial. They form the foundation of your work. Simply loop the yarn over your hook and pull it through to form a chain.
Once you have a chain, you have to learn single crochet (sc). Insert the hook into the chain, yarn over, and pull through. You then yarn over again and pull through both loops on the hook.
Another essential stitch is the double crochet (dc). Yarn over, insert the hook, yarn over and pull through, yarn over again and go through two loops. Finally, yarn over one more time and go through the last two loops.
You’ll also use slip stitches (sl st) to join ends or finish an edge. Insert the hook, yarn over, and pull through both the stitch and the loop on the hook in one go.
To make your fingerless gloves look even better, you can learn how to increase and decrease stitches. This adds shape to your work. For increasing, make two stitches in the same space. To decrease, combine two stitches into one.
Practice these techniques before starting your fingerless gloves crochet pattern. With these basic skills, you can begin your project confidently.
Step-by-Step Crochet Pattern for Fingerless Gloves
With the basics down, you’re ready to tackle a step-by-step fingerless gloves crochet pattern. The pattern is simple and caters to both beginners and experienced crocheters. Below you’ll find concise instructions on how to start and complete your project.
Starting with the Cuff
Begin your fingerless gloves with the cuff. This part sits snug around your wrist.
- Make a slip knot and chain enough to wrap comfortably around the wrist.
- Join the chain ends with a slip stitch, ensuring there’s no twist.
- Work in rounds of single crochet (sc) or half double crochet (hdc) for the desired width.
- Keep checking the fit around your wrist as you go.
Working the Hand and Thumb Hole
After the cuff, move to the hand portion with room for the thumb hole.
- Continue crocheting in rounds and extend above the wrist.
- To create the thumb hole, chain a few stitches and skip the same number of stitches in the round.
- On the next round, crochet into the chains to continue the hand’s pattern.
- Keep trying the glove on to ensure a good fit around the thumb and hand.
Finishing Touches and Edging
Finishing your gloves involves edging and weaving in loose ends.
- Finish the last round neatly with a slip stitch.
- Add a decorative edge or simple single crochet border if desired.
- Cut the yarn, leaving a tail.
- Use a yarn needle to weave in the ends.
Follow these steps carefully, and your fingerless gloves should look stylish and feel comfortable. Don’t hesitate to personalize the gloves in the subsequent customization section.
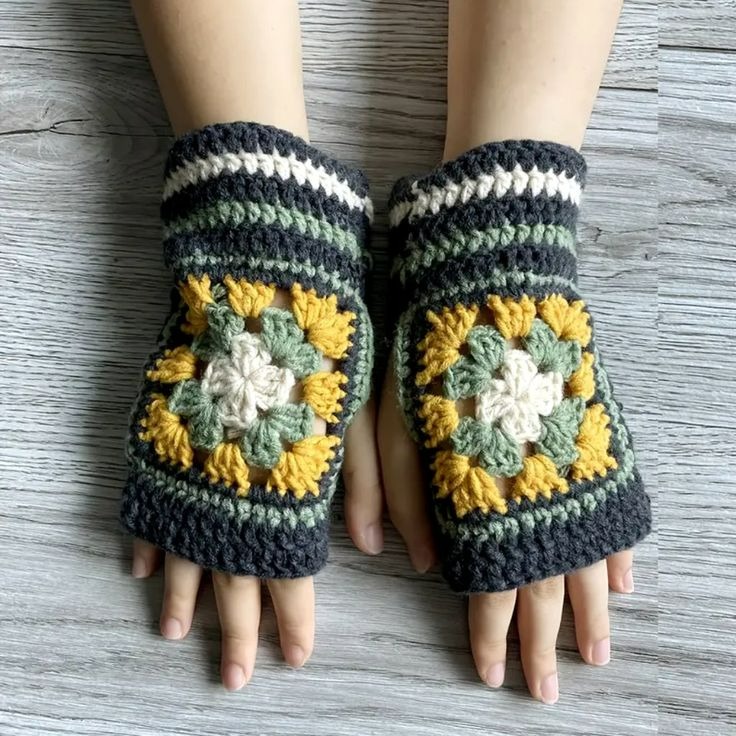
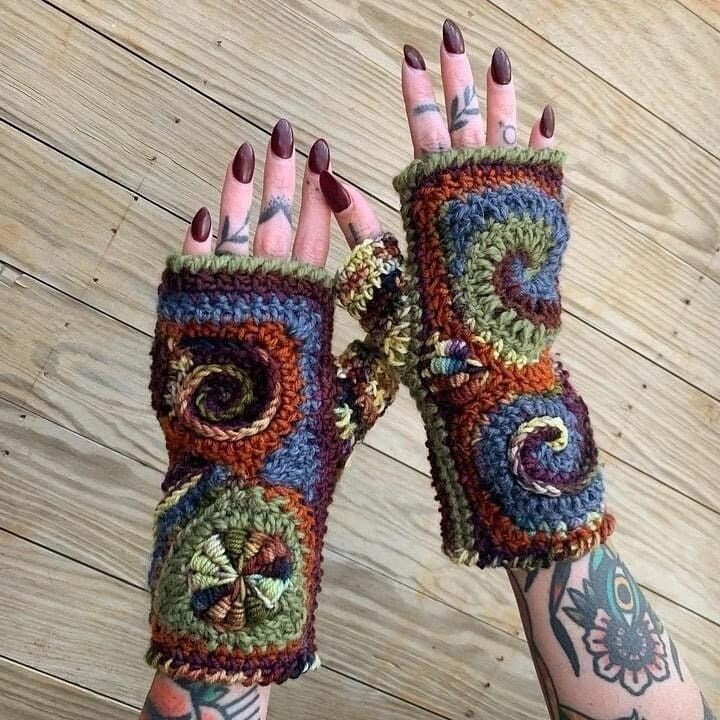
Variations and Customizations
Crafting fingerless gloves offers a lot of room for creativity. You can vary their look and feel by using different stitches or by adding unique touches.
Incorporating Different Stitches
Once comfortable with basic stitches, try incorporating new ones to add texture and style. Consider stitches like the bobble stitch for a 3D effect, or the shell stitch for a delicate touch. Use the puff stitch for a cozy, bulky look, or the basketweave stitch for intricate detail.
Experiment with stitch combinations. Mix single crochet with double crochet for a ribbed texture. Play with the heights of stitches to create patterns. These variations make your fingerless gloves unique and stylish.
Remember to keep track of your stitch count when experimenting. This ensures that your gloves remain symmetrical and fit well.
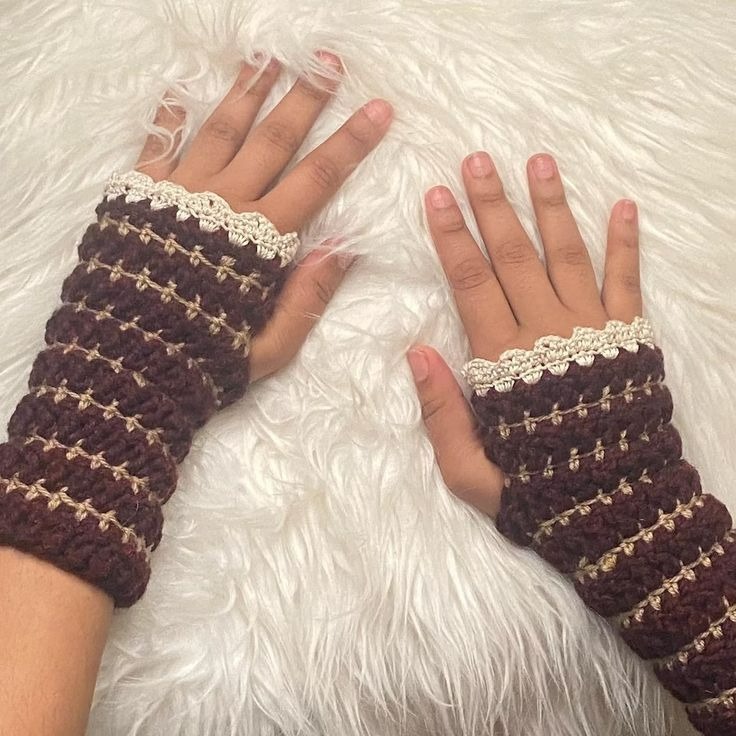
Adding Embellishments and Decorative Elements
Embellishments and decorative elements give your gloves a personal touch. Consider adding:
- Buttons: Attach buttons along the side for a vintage look.
- Lace: Crochet a lace border around the edges for an elegant flair.
- Appliques: Add small crochet appliques like flowers or stars.
- Ribbons: Weave ribbons through the stitches for a pop of color.
- Beads: Stitch beads into your work for sparkle.
Choose embellishments that complement your yarn’s color and texture. Attach them securely so they stay in place as you wear your gloves.
Personalizing your fingerless gloves crochet pattern makes them stand out. It reflects your style and adds character to your work. Have fun with the process and make each pair truly your own.
Tips for Achieving a Professional Finish
To ensure your fingerless gloves stand out, aim for a professional finish. Here are some tips:
Consistent Stitch Tension
Maintain even tension while crocheting. Uniform stitches give gloves a polished look. Adjust your grip if needed to keep tension steady.
Neat Joining of Rounds
When joining rounds, do so neatly. Avoid gaps and bulges for a seamless finish. Use stitch markers to help align your rounds correctly.
Symmetry in Both Gloves
Match the left and right gloves. Count stitches and rows to ensure they are identical. Asymmetry can detract from a professional appearance.
Blocking Your Gloves
Wash and shape your gloves after finishing. Lay them flat to dry. Blocking improves their shape and enhances the stitch pattern.
Remember, the key to a refined finish is attention to detail. Take time to perfect each stage of your crochet. These tips will help elevate your fingerless gloves from homemade to handcrafted with care.
Care and Maintenance of Crochet Fingerless Gloves
Taking proper care of your fingerless gloves crochet pattern creations ensures they last longer and look great. Here are some upkeep tips for your gloves:
Washing Your Gloves
It’s best to hand wash crochet items. Use cold water and a mild detergent. Gently squeeze the suds through the fabric without wringing. Rinse well to remove soap, and gently squeeze out water. Lay the gloves flat to air dry.
Storing Your Gloves
Keep your gloves in a cool, dry place. Avoid direct sunlight which can fade colors. Store them flat or rolled to avoid creases. Use cedar balls or lavender sachets to deter moths if storing for a long time.
Repairing Snags and Loose Ends
Snags can happen with use. If you notice one, gently pull the surrounding stitches to adjust the tension. If a thread becomes loose, use a crochet hook to weave it back into your work.
Retaining Shape and Elasticity
To keep gloves in shape, block them after each wash. Wet your gloves, squeeze out excess water and lay them flat. Shape them to their original form and let them dry. This maintains the fit and shape over time.
Caring for your fingerless gloves crochet pattern projects is simple. It extends their life and keeps them looking as good as new. Regular maintenance ensures that you can enjoy wearing your handmade accessories with pride and confidence.