Introduction to Crocheting Fingerless Gloves
Crocheting fingerless gloves is a fun and creative craft. These versatile accessories are perfect for the crisp days of fall or the cool evenings of spring. They offer warmth for your hands while keeping your fingers free for tasks like typing or texting.
Before diving into how to crochet fingerless gloves, let’s understand why they are so popular. Fingerless gloves are not only practical but also a stylish addition to any outfit. They can be a statement piece or a subtle complement to your wardrobe. Furthermore, they serve as an excellent project for both beginners and seasoned crocheters alike.
In this section, we will outline the basic knowledge required to start this project. This includes an overview of the materials you will need, the types of stitches that are commonly used, and initial steps on getting started with your pair of fingerless gloves. Armed with this information, you’ll be ready to tackle this enjoyable project with confidence. Let’s get those hooks ready and bring your creativity to life with a lovely pair of handmade fingerless gloves.
Materials and Tools Needed for Fingerless Gloves
To start your crochet project, gathering the correct materials and tools is crucial. Quality materials ensure a comfortable fit and durability for your fingerless gloves. Here’s what you’ll need:
- Yarn: Choose a yarn that is soft yet sturdy. Wool, acrylic, or a blend are great choices. Consider the color and texture to match your style.
- Crochet Hook: The size of the hook depends on the yarn weight. A 4mm to 5mm hook works well for most yarns used in gloves.
- Scissors: A sharp pair of scissors will help you snip the yarn cleanly.
- Tapestry Needle: This will be used to weave in ends once you complete your gloves.
- Stitch Markers: These are helpful for marking the start of a round or where increases or decreases are made.
- Measuring Tape: To ensure proper fit, measure the hand for which you’re making the gloves.
With these tools in hand, you are well on the way to creating your very own pair of fingerless gloves. Remember, the right tools not only make the process easier but also enhance the final product.
Selecting the Right Yarn and Crochet Hook
Choosing the right yarn is key for your fingerless gloves. You want yarn that feels good and holds up to wear. Wool gives warmth and is durable. Acrylic yarn is soft and comes in many colors. Sometimes, blending fibers is best to get both benefits.
Picking the perfect crochet hook size is also crucial. Your yarn’s label should suggest a hook size. For most glove yarns, a 4mm to 5mm hook is ideal. The right size hook will help your stitches look even and neat.
Always do a test swatch before starting. This makes sure your size is right. If your swatch is too small, use a bigger hook. If too big, try a smaller one. This step saves you time and yarn. It ensures your gloves will fit just right. Remember to count your stitches per inch from your swatch.
Your comfort with the hook matters too. Hooks come in different shapes and materials. Some have handles that are easier to hold. This can reduce hand strain during long crocheting sessions. Try different hooks to find the one that works best for you.
In summary, your choice in yarn and hook affects your project’s success. Go for quality yarn that suits your style and is comfortable to wear. Match it with a hook that fits the yarn and feels right in your hand. These choices lay the foundation for a pair of fingerless gloves that are both stylish and comfortable.
Basic Crochet Stitches Used in Fingerless Gloves
Before we dive into the step-by-step guide on how to crochet fingerless gloves, let’s learn the basic stitches. These stitches form the foundation of most crochet patterns, including fingerless gloves. Here’s a quick rundown of the essential stitches you’ll need to know:
- Chain Stitch (ch): This is the start of your crochet project. It creates a series of loops you’ll work into.
- Slip Stitch (sl st): Used to join stitches and finish off areas tightly.
- Single Crochet (sc): The most basic crochet stitch, building up your fabric.
- Double Crochet (dc): A taller stitch than the single crochet, it works up quickly.
Most fingerless gloves patterns will use these stitches in various combinations. To practice, create a small swatch using each stitch. This helps you get comfortable with the tension and the look of the stitches.
If terms like ‘ch’ or ‘dc’ are new to you, don’t worry. Each stitch has countless tutorials available online. In general, remember to:
- Keep even tension on your yarn.
- Count your stitches as you go to maintain the right size.
With these basic stitches mastered, you will be ready to tackle more complex patterns. But first, understanding and practicing these will significantly boost your confidence as you learn how to crochet fingerless gloves.
Step-by-Step Guide to Crocheting Fingerless Gloves
Now that you’re familiar with the basic stitches, let’s walk through the process of crocheting fingerless gloves. This guide will take you from start to finish, ensuring you can craft a cozy pair for yourself or as a gift. Here’s a simple, step-by-step breakdown to get you started:
- Making the Cuff:
- Start by crocheting a chain that wraps comfortably around the wrist.
- Join the chain ends with a slip stitch to form a circle.
- Work in rounds of single crochet (sc) to create the cuff to your desired length.
- Creating the Hand:
- Continue from the cuff, increasing stitches where necessary to widen for the hand.
- Keep tracking your stitch counts and rounds to maintain even sizing.
- Use a stitch marker to mark the start of each round.
- Shaping for the Thumb Hole:
- Once you reach the base of the thumb, chain a few stitches to create a gap.
- Resume single or double crochet in the next stitch, working around the chain.
- This space will form the thumb hole of your fingerless gloves.
- Finishing the Top:
- After the thumb hole, continue crocheting rounds for the hand portion.
- Stop when you reach the length that leaves your fingers free.
- Use slip stitches to taper off and finish the top edge neatly.
- Adding the Thumb:
- Reattach yarn at the thumb hole, and single crochet around the opening.
- Complete enough rounds until the thumb is covered to your satisfaction.
- Finish off with a slip stitch and weave in all your ends with a tapestry needle.
Remember to count your stitches and keep checking the fit as you go. This will ensure a comfortable and well-shaped glove. If a round seems off, don’t hesitate to unravel and correct it. With patience and practice, you will end up with a pair of beautifully crocheted fingerless gloves.
Adding Thumb Holes and Finishing Touches
When crafting fingerless gloves, the addition of thumb holes is a pivotal step. This grants functionality and comfort. Here’s how to make thumb holes and add those final touches:
- Shaping the Thumb Hole:
- Identify the thumb hole spot after the hand portion is mostly done.
- Chain a few loops where the thumb will go, skipping the base stitches.
- Connect the chain back into your glove’s rounds to continue the pattern.
- Secure and Even Edges:
- As you finish the top of the glove, ensure edges are smooth and tidy.
- For a firmer edge, use slip stitches to create a ribbed look.
- Weave in Loose Ends:
- Use a tapestry needle to weave in any loose yarn ends.
- Ensure these are tucked in well to prevent unraveling.
- Final Inspection:
- Try on the gloves to check the fit around the thumb and fingers.
- Look for any gaps or tight spots and adjust your stitches if needed.
These steps help achieve professional-looking fingerless gloves. Paying attention to the thumb holes and finishing touches can make your hand-crafted gloves look and feel tailor-made. Remember to follow your chosen pattern and always count your stitches for consistency. With practice, your techniques will improve, making your next pair even better than the last.
Troubleshooting Common Issues While Crocheting
As you learn how to crochet fingerless gloves, you might hit some snags. Don’t worry; it’s a part of the process. Here’s how to deal with some common issues you might encounter:
- Loose Stitches: If your stitches seem too loose, try using a smaller hook. Also, holding your yarn more tightly can help maintain consistent tension.
- Too Tight Stitches: Conversely, if you find your stitches are too tight, relax your grip on the yarn and consider switching to a larger hook.
- Uneven Edges: This usually happens when you add or miss stitches. Count your stitches regularly and use stitch markers to keep track of where each round begins and ends.
- Stitch Count Is Off: If you notice your stitch count doesn’t match up with the pattern, go back and check for any missed stitches or accidental increases. Unravel (or “frog”) if necessary and redo the round.
- Yarn Splitting: This can occur with some yarns when the hook catches only part of the yarn strand. To avoid this, crochet more slowly and with more attention to each stitch.
- Joining Rounds Visibly: When you join a new round, it can sometimes create an unsightly seam. To reduce this, use a slip stitch to join the rounds discreetly and always change colour in the last pull-through of a stitch when colour changes are required.
- Glove Doesn’t Fit: If the glove is too small or too big, check your gauge. You may need to adjust your hook size or change the number of stitches in the starting chain.
- Finger Holes Too Tight/Loose: Try on the gloves as you go and adjust the number of stitches for the fingers if needed. It’s easier to make changes as you work than after you’ve finished.
These tips can help you adjust your technique and keep your project on track. As you practice how to crochet fingerless gloves, remember that every mistake is a learning opportunity. Stay patient, and soon you’ll create gloves that not only fit perfectly but also look beautifully handmade.
Patterns and Variations for Fingerless Gloves
Exploring different patterns and variations can add a unique touch to your fingerless gloves. Here are some ideas to try:
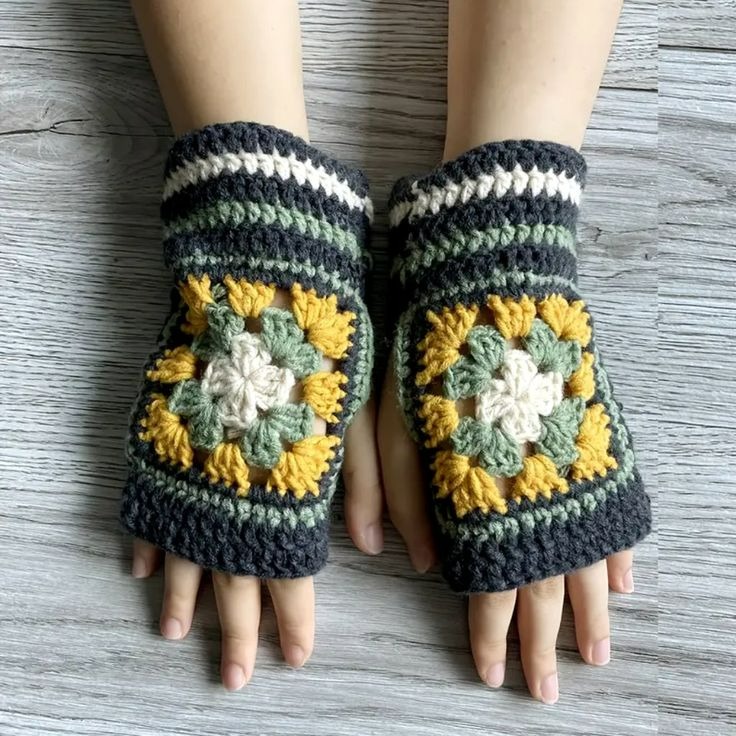
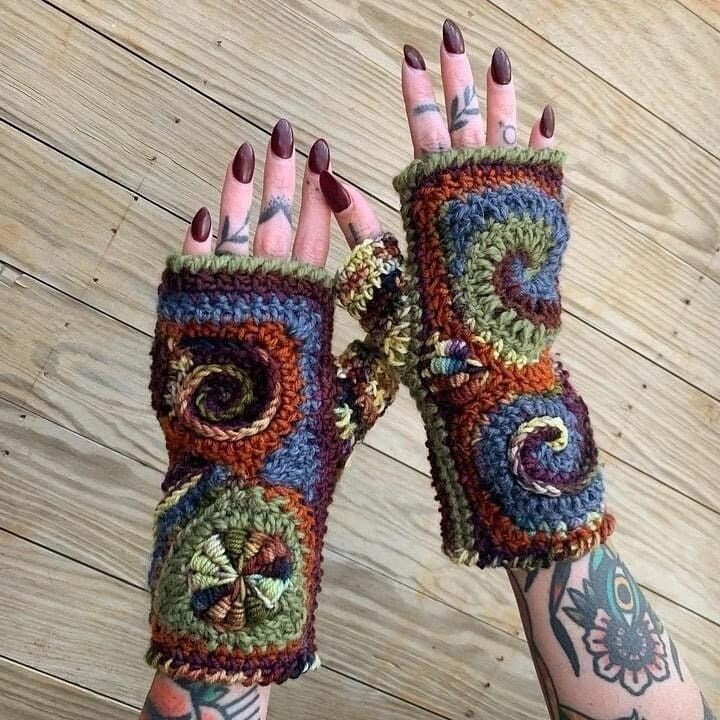
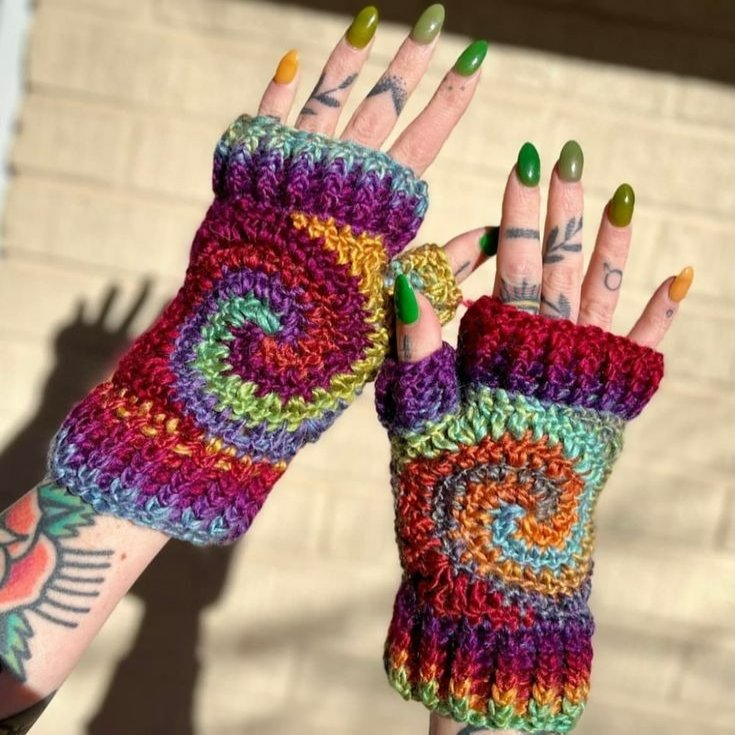
- Ripple Pattern: Includes waves of color for a dynamic look.
- Bobble Stitch: Adds texture with small, round bobbles.
- Lace Pattern: Creates a delicate, open design using chains and spaces.
- Striped Gloves: Use different colors for each round to make stripes.
- Wrist Warmers: Make them shorter for a stylish, minimalist version.
- Long Arm Warmers: Extend the length to go up the forearm.
When you look for patterns, choose one that matches your skill level. Beginner patterns might use simple stitches like single and double crochets. More advanced patterns can include complex stitches and color changes.
Always read the pattern fully before you start. This helps you understand the steps you’ll take. If the pattern suggests yarn or hook sizes you don’t have, remember your swatch test. It helps you make adjustments for a good fit.
You can also design your own pattern. Start with a basic glove and then add features like flaps, buttons, or different stitch textures. Experimenting with variations keeps crocheting fun and personalizes your creations.
In summary, whether you choose a pre-made pattern or design your own, there’s no limit to the creativity. Enjoy mixing and matching stitches and colors to craft a pair of fingerless gloves that no one else has!